What is replication? Link to heading
Replcation is a process in which a client or multiple clients send information to the server, once received, the server, which holds the authoritative state, is in charge of sinchronizing all the clients’ states in game. This allows for interactions in online multiplayer games to feel like they’re happening in real time even if the other players are thousands of miles away.
Replication concepts Link to heading
- Client: The way unreal engine’s networking works is by using a client-server architecture, on multiplayer games many clients (PCs or consoles) on different locations will send data to a central machine (server) for processing, each client controls a pawn that it owns in the server.
- Server: The server receives and updates data for clients on a multiplayer game, it holds the authoritative state for the game and is in charge of replicating this state to all relevant clients.
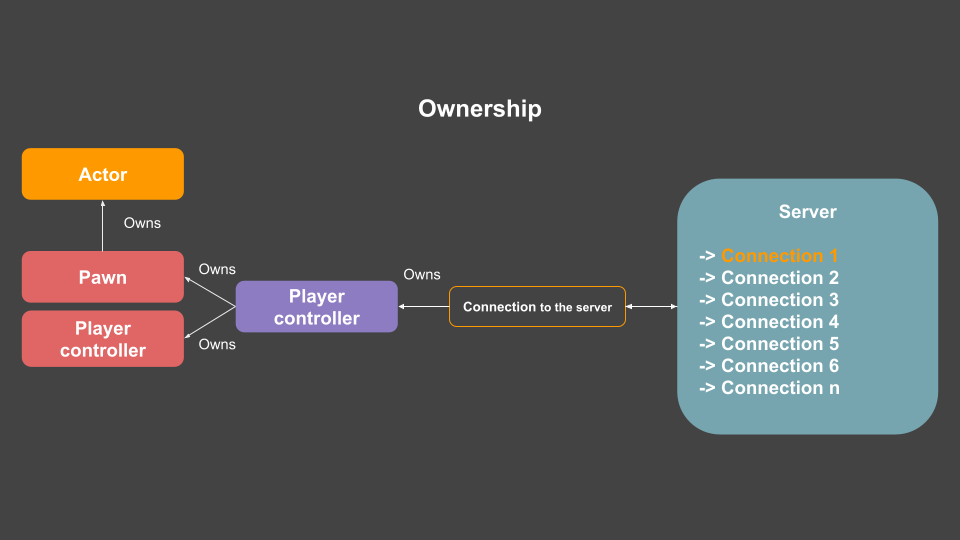
- Ownership: When a connection from a client to a server is established it’s represented as a player, the server has the connection being the owner of the player that’s being assigned to the client, consequently owning every actor that said player owns, this ownership can be traced all the way back to the connection following the relationship chain.
RPCs: Link to heading
Remote procedure calls are unidirectional functions that help the clients and server call functions on each other over a network connection.
Types of RPCs: Link to heading
- Client: Executed on the client connection owning the actor.
- Server: Executed on the server.
- Remote: Must be called on an actor owned by a client. Behaves both like a client and a server RPC, but never executes on the local side of the connection.
- NetMulticast: Executed on the server and all relevant clients currently connected.
Roles: Link to heading
Roles are a way to determine who has the authority to change a player’s state, to check who has authority over certain actors and what actors are going to be replicated, not every actor is replicated every tick, which may cause characters’s movements to look choppy in game, to mitigate this, the server will be simulating the actor’s movement between ticks.
- ROLE_None: The actor won’t be replicated
- ROLE_SimulatedProxy: This actor will simulate the state but doesn’t have the authority to change it or call remote functions. Used to predict an actor’s movement or other actions and extrapolate them for other clients.
- ROLE_AutonomousProxy: This is an actor controlled by a human, similar to the simulated proxy, it uses the human input to extrapolate information and show them to other clients.
- ROLE_Authority: Holds the true state and has the authority change it and call functions, the actor is in charge of tracking property changes and replicating them to other clients.
Implementation Link to heading
Replicate the actor Link to heading
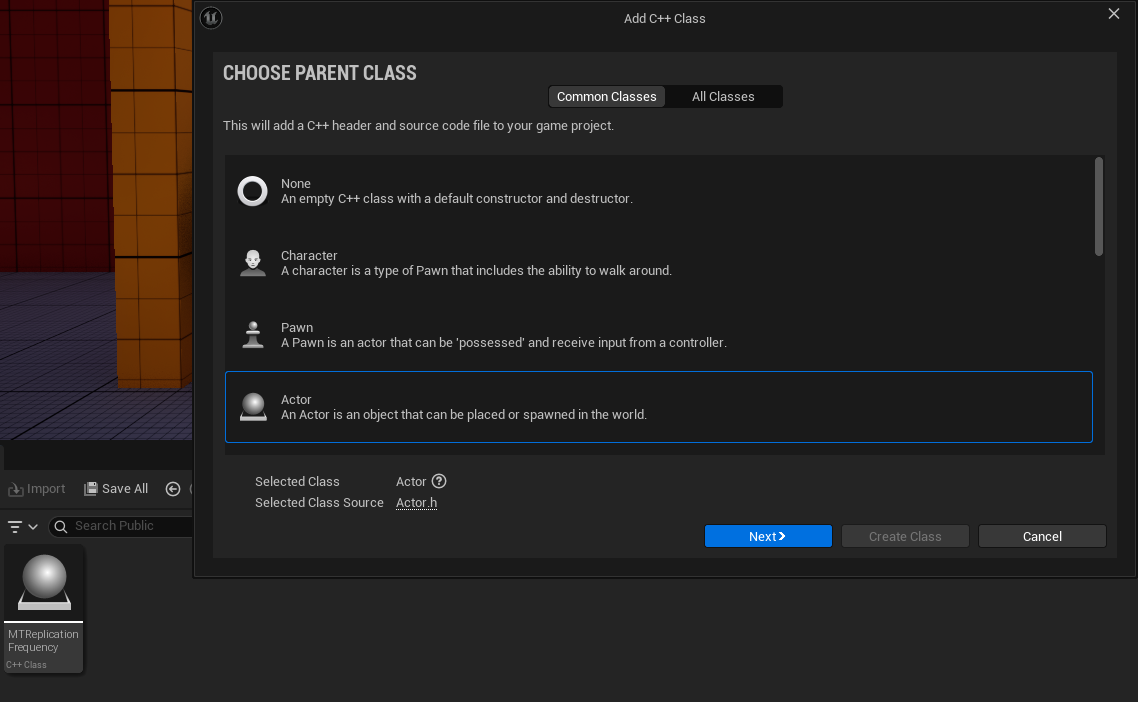
In this example we will be replicating a counter variable, first, create a cpp class that inherits from Actor.
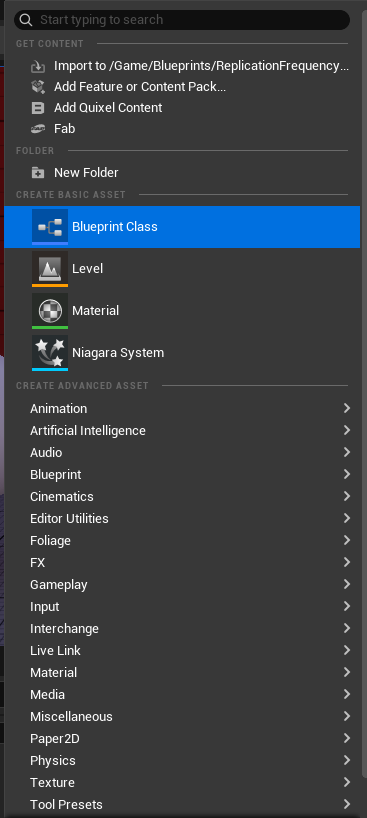
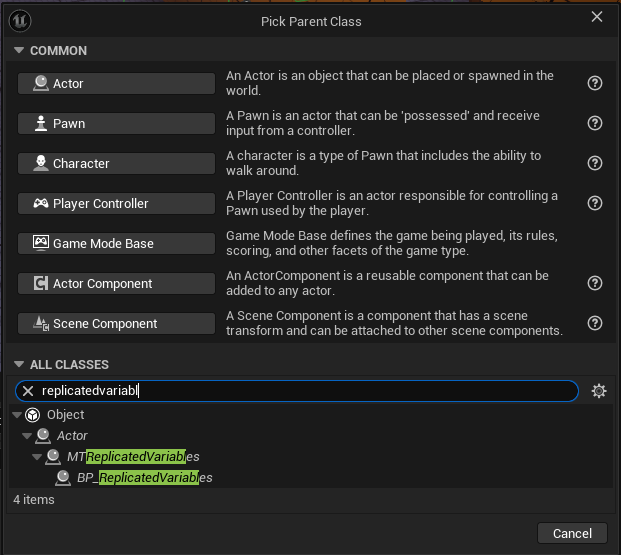
After that head to your blueprints folder and create a blueprint class based on the one you just created.
Head to your class defaults and search for the “Replicates” property and make sure it’s set to true.
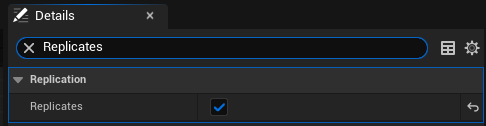
Once that’s set you should be ready to start replicating variables on blueprints or code.
On your header file, add on the public section an override to the function GetLifetimeReplicatedProps, including the necessary modifiers and parameters.
public:
	virtual void GetLifetimeReplicatedProps(TArray<FLifetimeProperty>& OutLifetimeProps) const override;
};
After that, head to your .cpp file and declare the function like so and call the function’s parent using Super. Here you will be adding the variables that need replication.
void AMTReplicatedVariables::GetLifetimeReplicatedProps(TArray<FLifetimeProperty>& OutLifetimeProps) const
{
	Super::GetLifetimeReplicatedProps(OutLifetimeProps);
}
Using OnRepNotify Link to heading
RepNotifies are called both on client and server when a variable changes, making it more efficient than replicating it normally. Continuing with the previous example, we will be tracking the number of times the character interacts with the sphere, make sure to first create the IInteractable interface and implement it inside your class.
class MT_API AMTReplicatedVariables : public AActor, public IInteractable
{
public:
	UPROPERTY(BlueprintReadOnly, EditAnywhere)
	class USphereComponent* SphereComponent;

	UPROPERTY(ReplicatedUsing = OnRep_SphereInteractionCounter)
	int SphereInteractionCounter = 0;

	UFUNCTION()
	void OnRep_SphereInteractionCounter();

	virtual void Interact() override;
}
For purely visual effects, create a sphere to more easily find the actor on the map, then, set the variable SpherePositionCounter to replicate, add in your variable’s macro ReplicatedUsing = OnRep_SpherePositionCounter, then declare the function.
In your .cpp file, include this module, to create the sphere:
#include <Components/SphereComponent.h>
Then, on your constructor, create the sphere.
AMTReplicatedVariables::AMTReplicatedVariables()
{
// Sphere component
SphereComponent = CreateDefaultSubobject<USphereComponent>("Detection Sphere");
}
Once that is set, add the variable to your GetLifetimeReplicatedProps like so:
DOREPLIFETIME_CONDITION_NOTIFY(AMTReplicatedVariables, SphereInteractionCounter, COND_None, REPNOTIFY_Always);
This will allow the variable to replicate properly.
Define the function that you got from the interface and make it so that each time the server interacts with it, the counter goes up.
void AMTReplicatedVariables::Interact()
{
	if (HasAuthority())
	{
		SphereInteractionCounter += 1;
	}
}
Then, create the definition for your rep notify.
void AMTReplicatedVariables::OnRep_SphereInteractionCounter()
{
		if (GEngine)
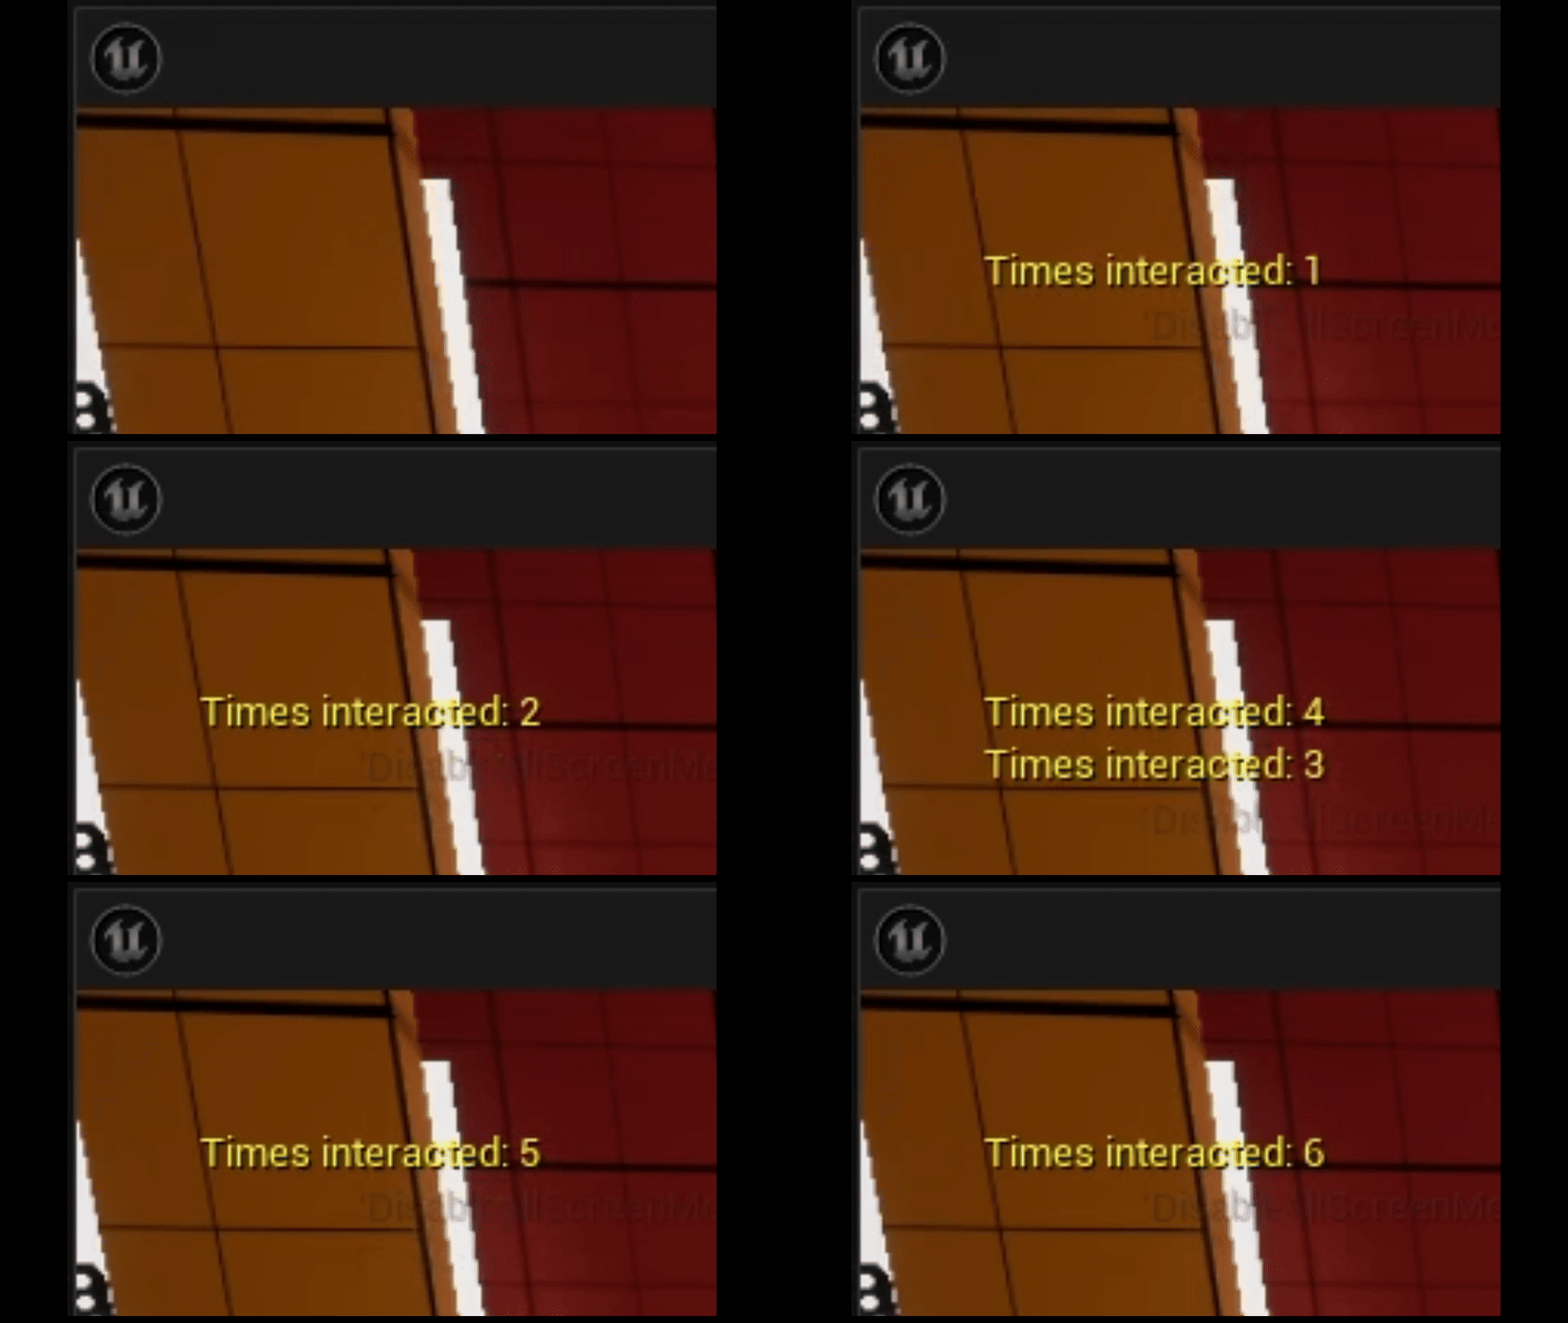
		GEngine->AddOnScreenDebugMessage(-1, 1.0f, FColor::Yellow, FString::Printf(TEXT("Times interacted: %i"), SphereInteractionCounter));
}
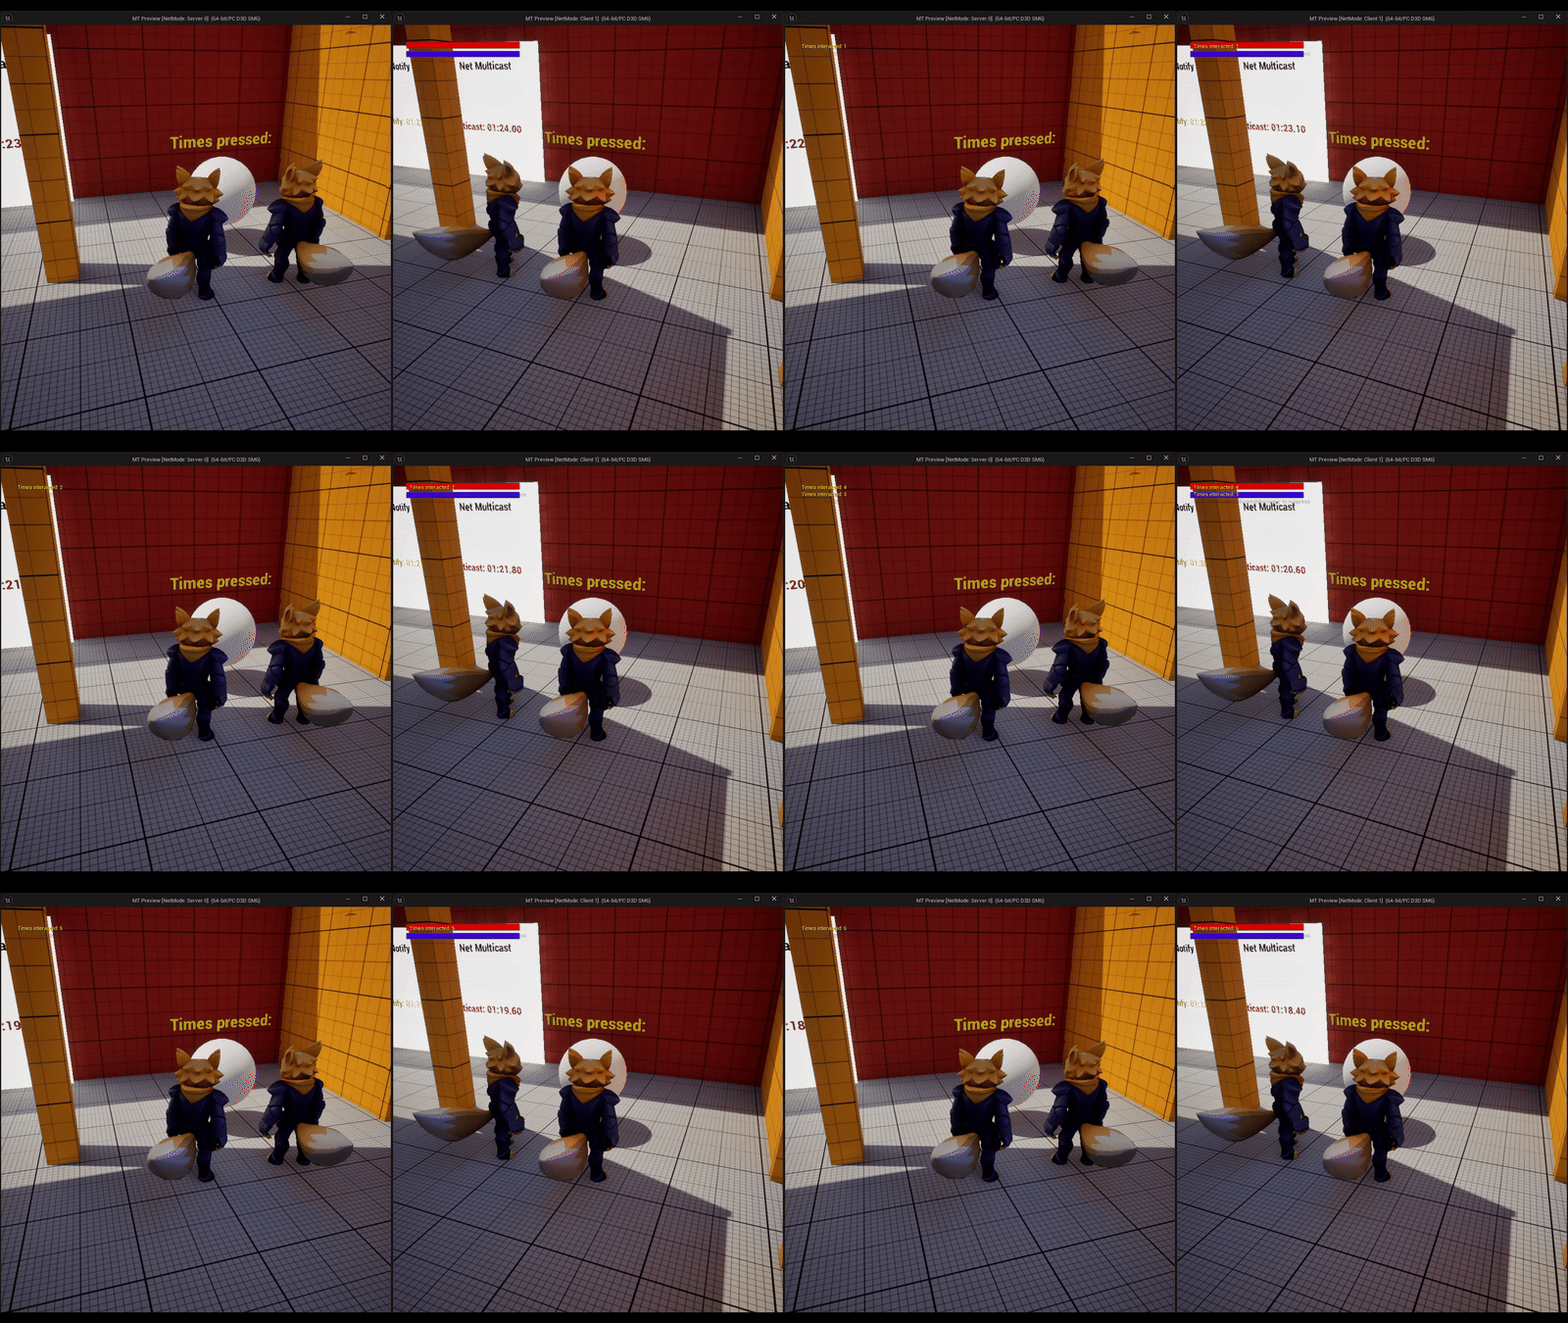
After compiling you should be able to see your sphere counter go up each time the server interacts with the sphere.
Using RPCs Link to heading
To finish this example, you will be adding a VFX which will be called using an RPC. First go to your header file and add the following lines:
UFUNCTION(NetMulticast, Reliable)
void MulticastCounterTextUpdate(int UpdatedCounter);

void MulticastCounterTextUpdate_Implementation(int UpdatedCounter);

UFUNCTION(Server, Reliable)
void ServerCounterCheck(int UpdatedCounter);

void ServerCounterCheck_Implementation(int UpdatedCounter);

UFUNCTION(NetMulticast, Unreliable)
void MulticastVFXCall();

void MulticastVFXCall_Implementation();

UPROPERTY(EditDefaultsOnly)
class UTextRenderComponent* InteractionCounterText;

UPROPERTY(EditAnywhere, BlueprintReadWrite, Category = "Effects")
class UNiagaraSystem* NiagaraSystem;

UPROPERTY(EditAnywhere, BlueprintReadWrite, Category = "Effects")
class UNiagaraComponent* NiagaraComponent;

void ResetTimer();

FTimerHandle VFXTimerHandle;
To declare an RPC you must add to it’s UFUNCTION the type of RPC you’ll be calling and whether it’s reliable or unreliable. A reliable RPC means that it’ll be called regardless of the amount of bandwith being used, if marked unreliable, it’ll only be called if there’s bandwidth left on the connection. The first RPC MulticastCounterTextUpdate will be used to update a counter text that you will be adding on top of your sphere, make sure to also declare it’s implementation, which will be the one where you’ll add the logic later on. The next RPC is a Server RPC ServerCounterCheck, just like the multicast, you need to add the type and whether it’s reliable or unreliable, also make sure to add it’s _Implementation. The last multicast RPC will be used to call the VFX.
Next, add a UTextRenderComponent, UNiagaraSystem and UNiagaraComponent, these ones will be used to add the text and spawn a VFX on top of the ball, they will be called on our RPCs when some conditions are met. Finally add a timer handler, this will be used to deactivate the niagara system and despawn it (this one is for niagara systems that loop).
To use a UNiagaraComponent go to your build.cs file and on the PublicDependencyModuleNames add the “Niagara” module.
public MT(ReadOnlyTargetRules Target) : base(Target)
	{
		PCHUsage = PCHUsageMode.UseExplicitOrSharedPCHs;

		PublicDependencyModuleNames.AddRange(new string[] { "Core", "CoreUObject", "Engine", "InputCore", "EnhancedInput", "GameplayAbilities", "GameplayTags", "GameplayTasks", "Niagara", "IrisCore" });

		SetupIrisSupport(Target);
	}
Now go to your cpp file and add the counter and VFX to the constructor.
	// Counter text
	FString Text = "Times reached:";
	InteractionCounterText = CreateDefaultSubobject<UTextRenderComponent>(*Text);
	InteractionCounterText->SetText(FText::FromString("Times pressed:"));
	InteractionCounterText->SetTextRenderColor(FColor::Yellow);
	InteractionCounterText->SetXScale(1.0f);
	InteractionCounterText->SetYScale(1.0f);
	InteractionCounterText->SetHorizontalAlignment(EHorizTextAligment::EHTA_Center);
	InteractionCounterText->SetupAttachment(SphereComponent);

	// Explosion vfx
	NiagaraComponent = CreateDefaultSubobject<UNiagaraComponent>("Explosion VFX");
	NiagaraComponent->SetIsReplicated(true);
Add a call to the server RPC on your Interact function, this will only happen on the server and won’t send anything to the clients.
void AMTReplicatedVariables::Interact()
{
	if (HasAuthority())
	{
		SphereInteractionCounter += 1;
		ServerCounterCheck(SphereInteractionCounter);
	}
}
For this example you will only be calling the multicast RPCs only when the counter reaches a value that’s a multiple of three. Call the server RPC when your counter is being updated.
void AMTReplicatedVariables::ServerCounterCheck_Implementation(int UpdatedCounter)
{
	if (UpdatedCounter % 3 == 0)
	{
		MulticastCounterTextUpdate(UpdatedCounter);
		MulticastVFXCall();
	}
}
Then, add the implementation for the counter update, make an FString to add the text of the int value received. Validate that the text component is valid and finally update the text with the new value.
void AMTReplicatedVariables::MulticastCounterTextUpdate_Implementation(int UpdatedCounter)
{
	FString MyText = "Times pressed: ";
	MyText.Append(FString::FromInt(UpdatedCounter));
	FText ResultText = FText::FromString(MyText);
	if (InteractionCounterText)
	{
		InteractionCounterText->SetText(ResultText);
	}
}
To add the VFX, implement the MulticastVFXCall first, you’ll need a UWorld type variable to set the timer and to spawn the VFX, set the timer and on it’s third parameter add a pointer to a new function &AMTReplicationFrequency::ResetTimer to stop the timer and deactivate the VFX. Add the desired timer duration, in this case 1.0f, then validate the niagara system and spawn it.
void AMTReplicatedVariables::MulticastVFXCall_Implementation()
{
	UWorld* World = GetWorld();
	World->GetTimerManager().SetTimer(VFXTimerHandle, this, &AMTReplicatedVariables::ResetTimer, 1.0f, false);
	if (NiagaraSystem)
	{
		NiagaraComponent = UNiagaraFunctionLibrary::SpawnSystemAtLocation(World, NiagaraSystem, GetActorLocation(), GetActorRotation());
	}
}
The ResetTimer function will be in charge of clearing the timer and deactivating the VFX to prevent it from looping when it doesn’t need to.
void AMTReplicatedVariables::ResetTimer()
{
	GetWorldTimerManager().ClearTimer(VFXTimerHandle);
	if (NiagaraSystem && NiagaraComponent)
	{
		NiagaraComponent->Deactivate();
	}
}
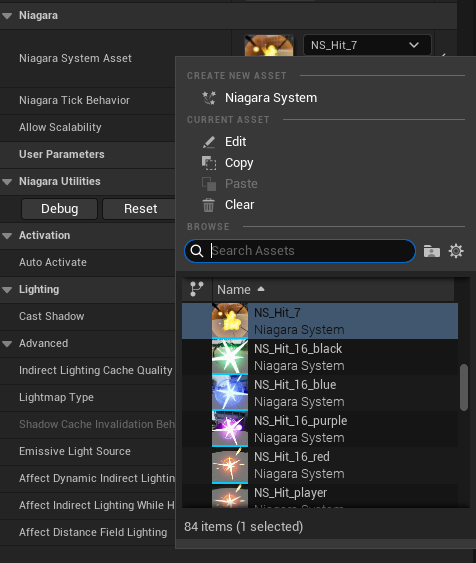
On your blueprint select the niagara system component and add the desired niagara system asset.
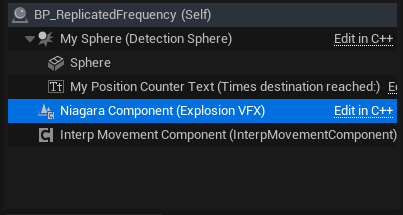
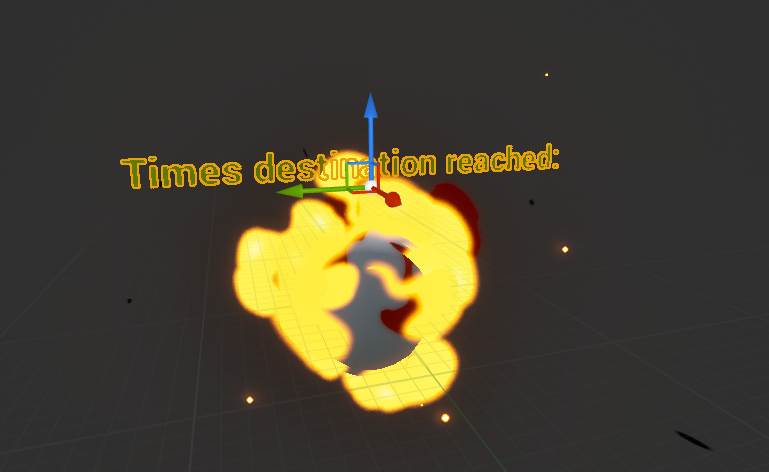
Head to the blueprint viewport, you should now see both your components for the text and VFX, adjust them if necessary to the desired position.
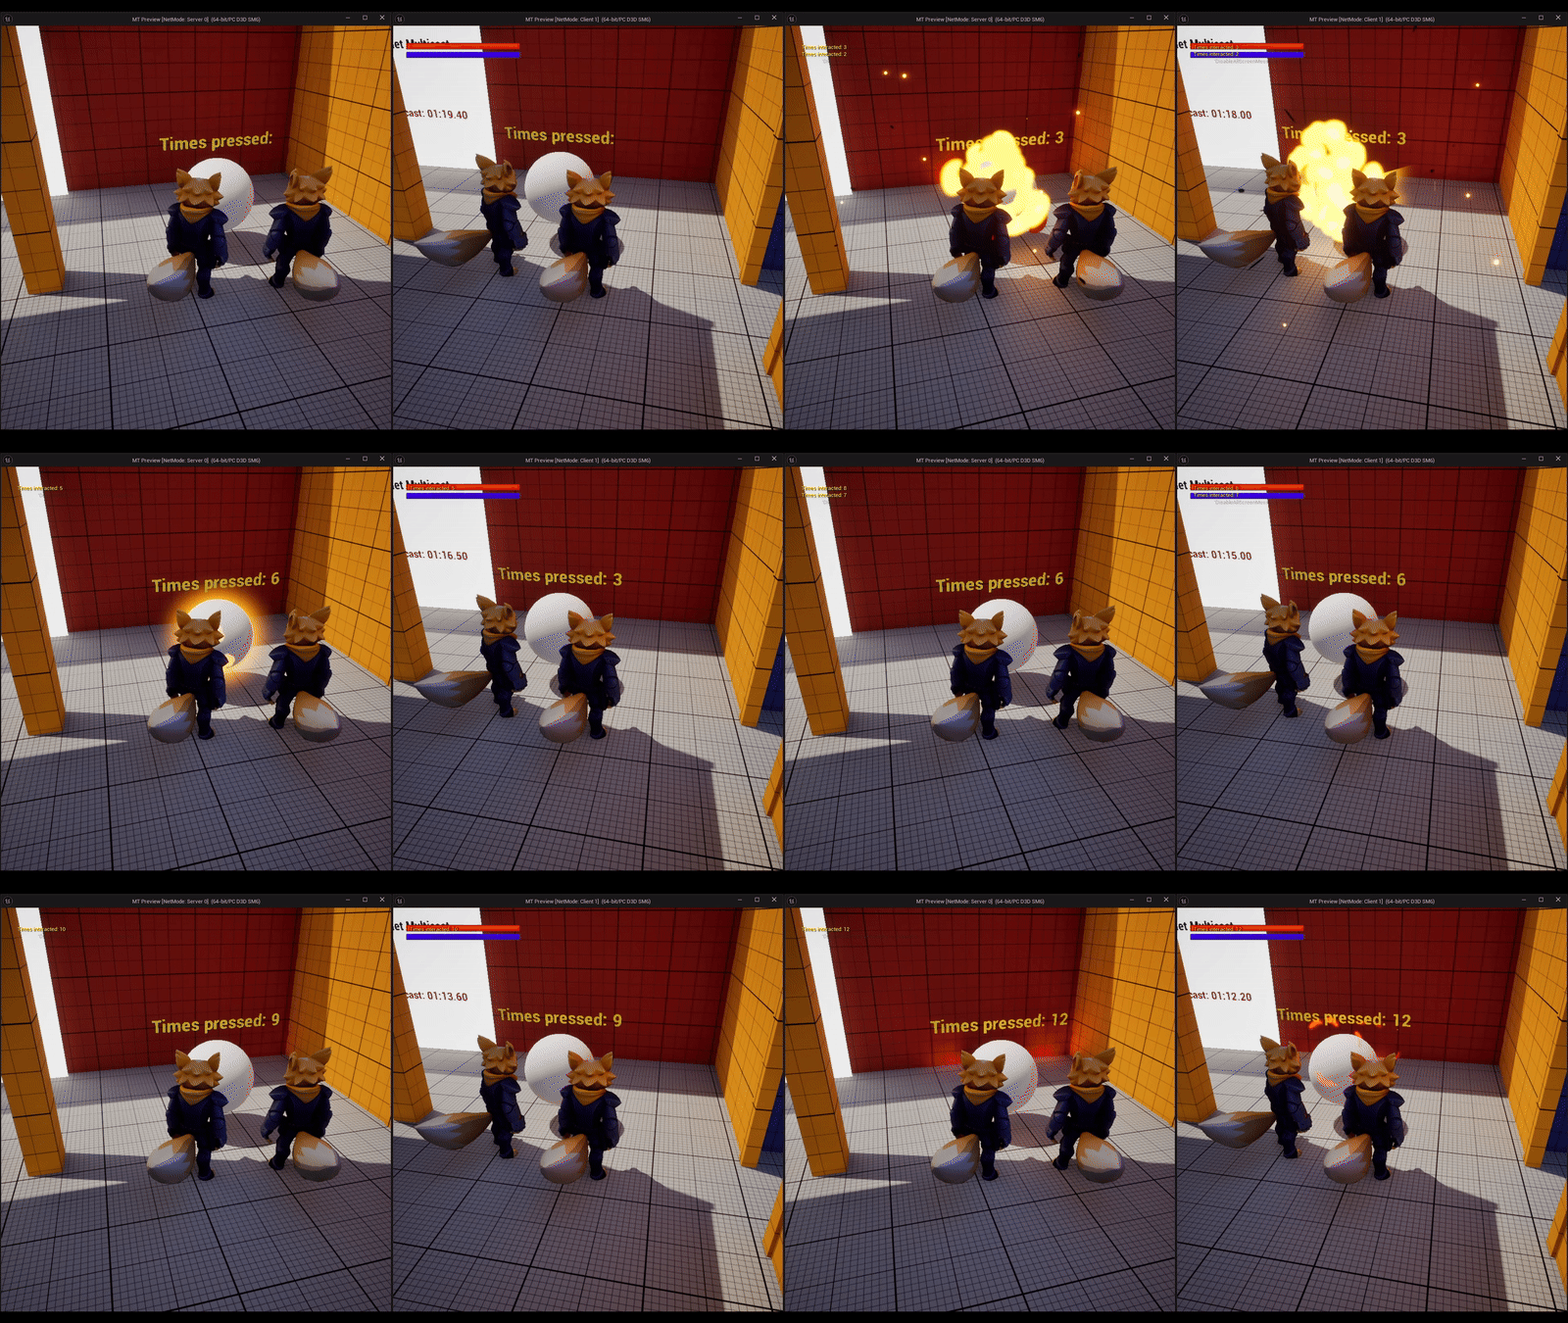
After compiling your code and the blueprint you should now be able to see how the vfx spawns and the counter updates accordinly with the conditions set on the code.
 ##CHANGEEEEEEEEEEEEEEEEEEE
References Link to heading
- Remote Procedure Calls in Unreal Engine | Unreal Engine 5.5 Documentation | Epic Developer Community. (2025). Epic Games Developer. https://dev.epicgames.com/documentation/en-us/unreal-engine/remote-procedure-calls-in-unreal-engine.
- Replication | An Unreal Engine Blog by Cedric Neukirchen. (2023). Cedric-Neukirchen.net. https://cedric-neukirchen.net/docs/multiplayer-compendium/replication/.
- UTextRenderComponent | Unreal Engine 5.5 Documentation | Epic Developer Community. (2025). Epic Games Developer. https://dev.epicgames.com/documentation/en-us/unreal-engine/API/Runtime/Engine/Components/UTextRenderComponent.
- Using Timers in Unreal Engine | Unreal Engine 5.5 Documentation | Epic Developer Community. (2025). Epic Games Developer. https://dev.epicgames.com/documentation/en-us/unreal-engine/using-timers-in-unreal-engine.